How to install Wordpress on your hosting
This manual is designed to guide the user step by step through the process of automatically installing WordPress using the SWPanel control panel. This allows you to have a fully functional website within minutes, without the need for complex manual installations.
Requirements to follow this manual
To complete this process, you will need:
- An active hosting service managed via SWPanel.
- Access to SWPanel with administrator permissions.
- An active email account to associate with the WordPress site administrator.
1. Automatic WordPress Installation from SWPanel
Step 1: Access SWPanel and select your hosting service
First, log into SWPanel using your credentials and go to the Dashboard (main control panel) of the hosting service where you want to install WordPress.

info_capture The screenshot is for reference only. It was taken using version 2026.000.0001 on 13/01/2026. It may differ from the current version of SWPanel.
Tip: Use the search bar at the top of the panel to quickly locate the hosting service you want to manage.
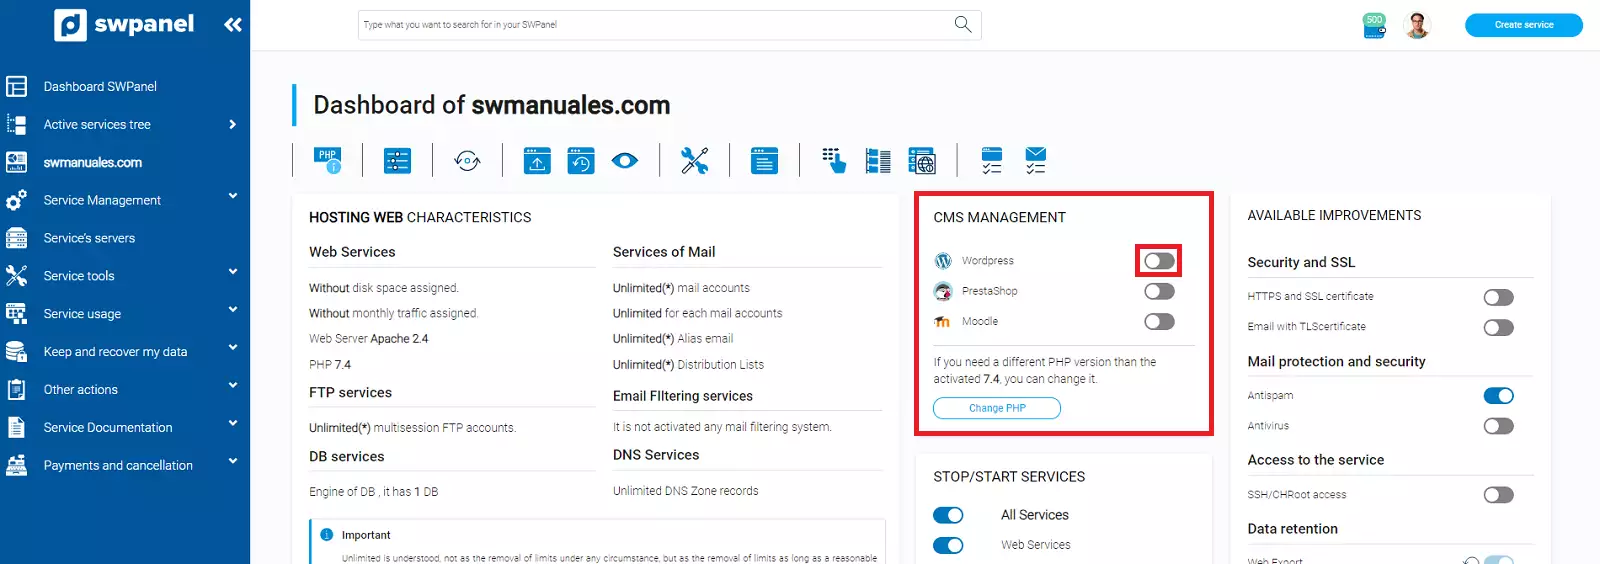
Step 2: Enable CMS application management
Once inside your service dashboard, go to the CMS Application Management section and activate the WordPress option.
info_capture The screenshot is for reference only. It was taken using version 2026.000.0001 on 13/01/2026. It may differ from the current version of SWPanel.
Important: Only one CMS application can be active per service. If another CMS is already active, it must be deactivated before proceeding.
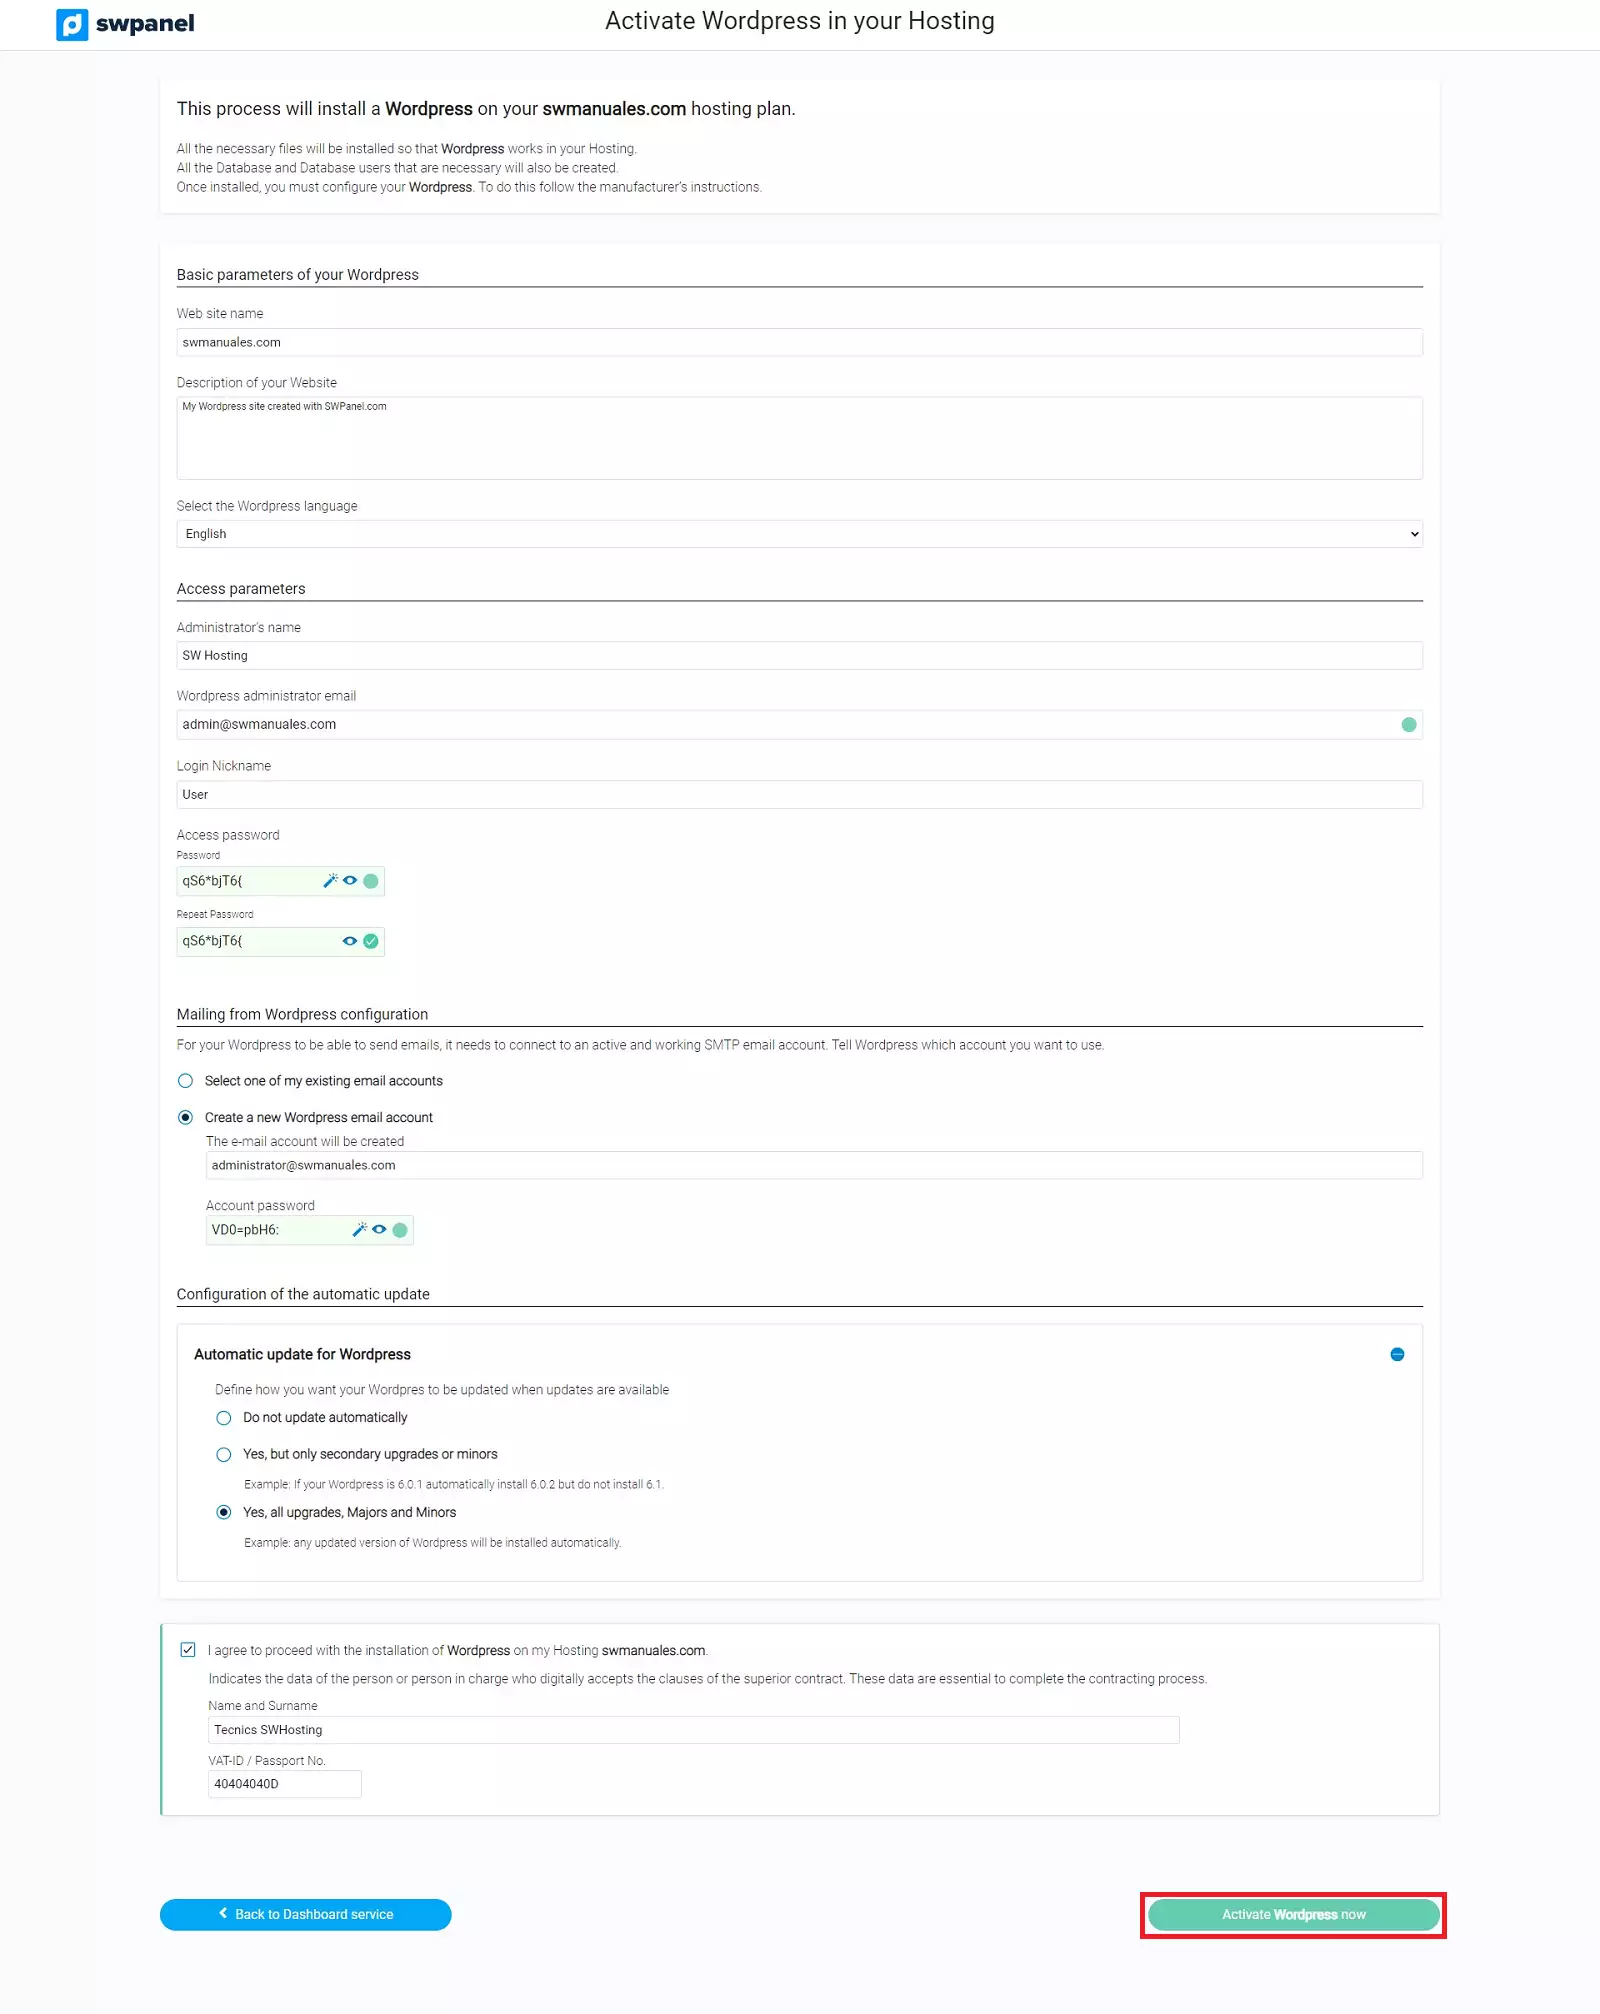
Step 3: Pre-installation configuration
Once WordPress is activated, a configuration form will appear with various fields. These options allow you to customize your installation before launching the automatic setup:
a. Basic WordPress parameters
- Site name: This will be the main title of your website.
- Description: This will appear in the browser tab and in your site's metadata.
- Language: Choose the language you want for the WordPress admin panel.
b. Access credentials
- Administrator name: Full name of the person responsible for the site.
- Administrator email: Email address associated with the admin, used for notifications and recovery.
- Username/Nickname: Username for logging into WordPress.
- Password: Secure password for the above user.
c. Email sending configuration
WordPress will send emails from your site (e.g., for password resets or notifications). This is automatically configured using SMTP. You can choose to:
- Use an existing email account.
- Create a new email account during this process.
d. Automatic updates
You can choose whether WordPress should update automatically. Three main options are available:
- No automatic updates.
- Only minor updates.
- All updates (including security and new features).
info_capture The screenshot is for reference only. It was taken using version 2026.000.0001 on 13/01/2026. It may differ from the current version of SWPanel.
Step 4: Activate WordPress
Once you’ve completed all configuration fields, click the “Activate WordPress now” button. This will initiate the automatic installation process.
Within a few minutes, WordPress will be fully installed and functional. You will also receive an email with the following details:
- Website URL.
- Admin panel URL.
- Username and password for access.
2. Managing WordPress from SWPanel
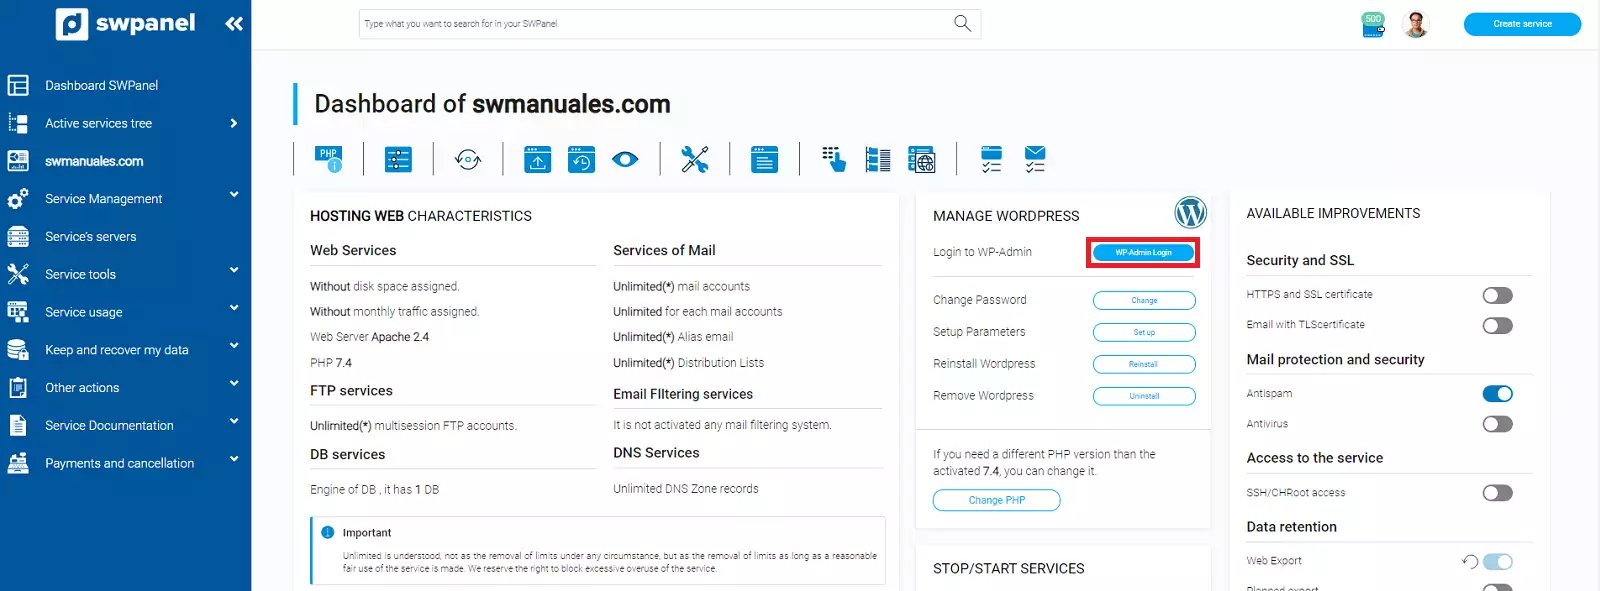
Once WordPress is successfully installed, the Manage CMS section will be renamed to Manage WordPress.
From this new section, you will be able to perform various actions related to your WordPress installation directly from SWPanel:
info_capture The screenshot is for reference only. It was taken using version 2026.000.0001 on 13/01/2026. It may differ from the current version of SWPanel.
Available management options include:
- Direct access to the WordPress admin dashboard.
- Viewing or modifying configuration parameters.
- Checking logs or activity records.
- Reviewing the CMS status and available updates.
Note: SWPanel does not provide direct technical support for WordPress. For specific issues, please consult the official WordPress documentation or contact their support service.