Connect to your Hosting by console through PuTTY
In this manual, we will teach you how to access the console of a hosting service, hosted on your Cloud server with SWPanel as the management tool, using the SSH/CHRoot user and the free PuTTY application.
⚠️To activate the SSH/CHRoot user and password, we must have a hosting service within a self-managed cloud using SWPanel. Users of standard hosting services do not have this option.⚠️
What is PuTTY?
PuTTY is a free SSH client that allows us to connect to another machine remotely or via Serial. Its most common use is to connect to a server to which we do not have physical access, enabling us to execute commands within it. By being able to run commands within our hosting service, we can perform operations such as modifying configuration files or copying, inspecting, analyzing, or moving files and directories. The program is completely free and secure.
How do I get PuTTY?
You can download the PuTTY application from its official website in the downloads section; simply choose the version for your operating system. For example, if you have Windows 10 (64-bit), you only need to click on the first download link on the page.
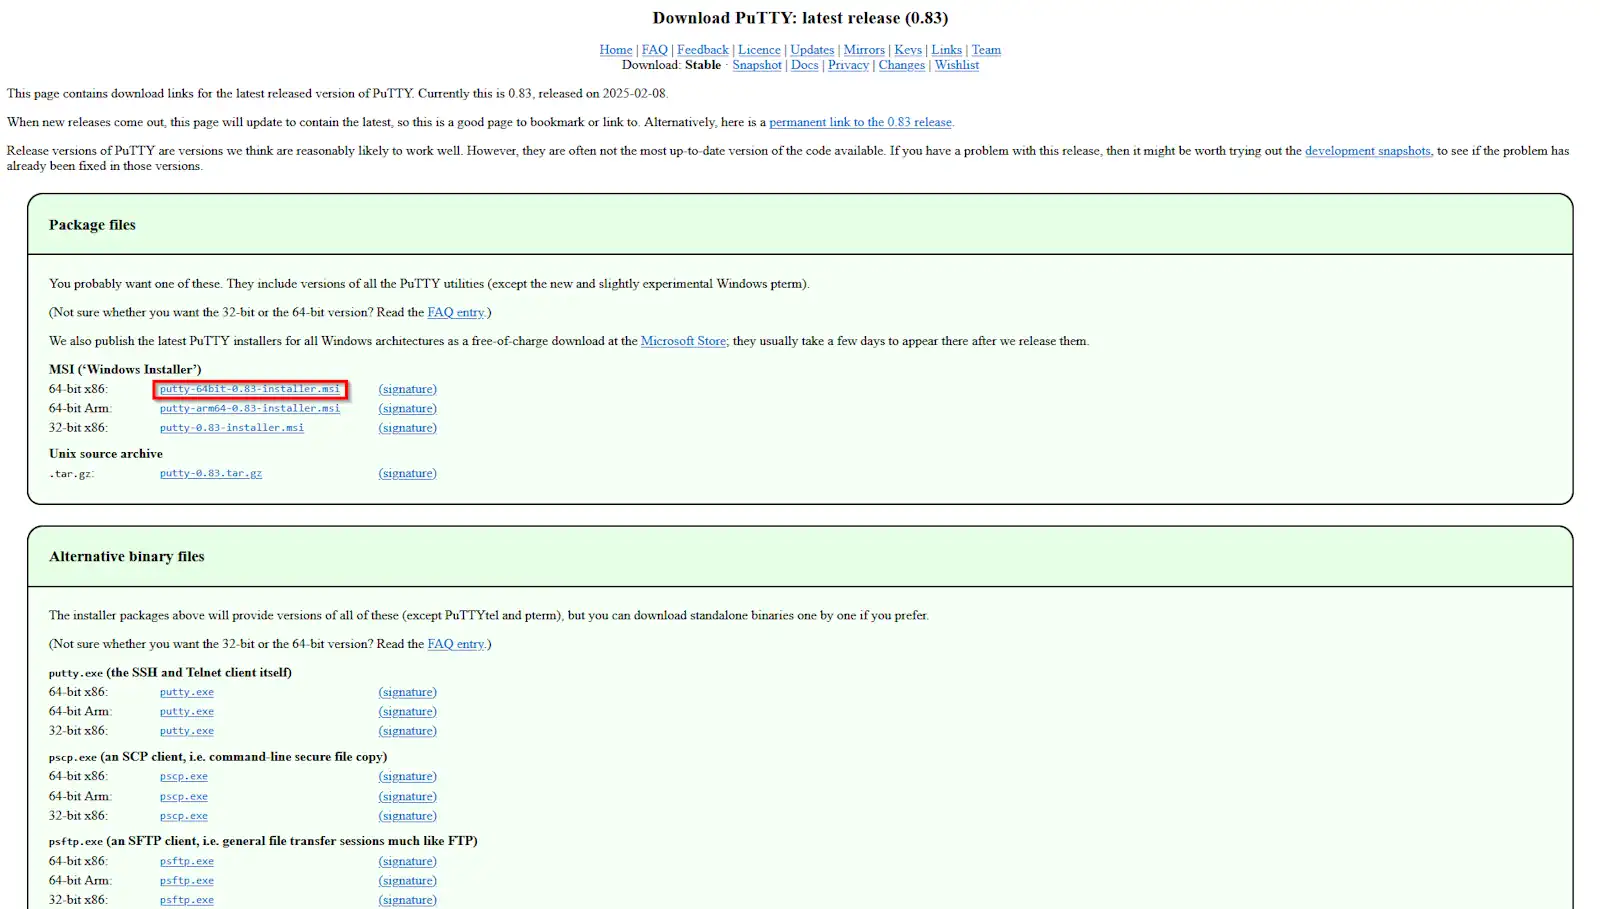
Once the installation package is downloaded, simply run it and follow the standard installation procedure.
Gathering data to access my hosting console
- To access the console of our hosting service, we will need to gather some information:
- The IP or server name
- The port to connect through
- The connection method
- The SSH/CHRoot user and password
- Gathering data - IP
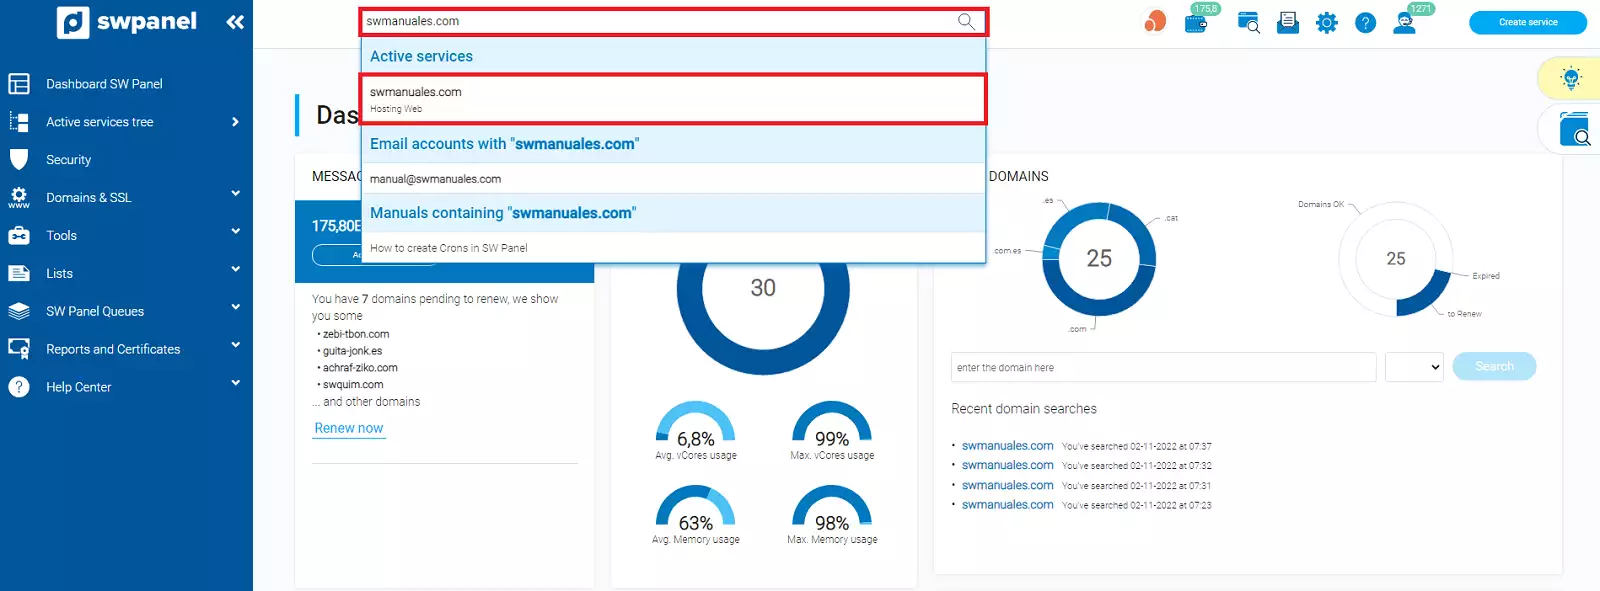
To find the IP, go to the dashboard of our Hosting service, search for its name in the central search bar of SWPanel, and click on the name that appears in the dropdown.

info_capture The screenshot is for reference only. It was taken from version 2025.02.0002 on 17/03/2025. It may differ from what the current version of SWPanel displays.
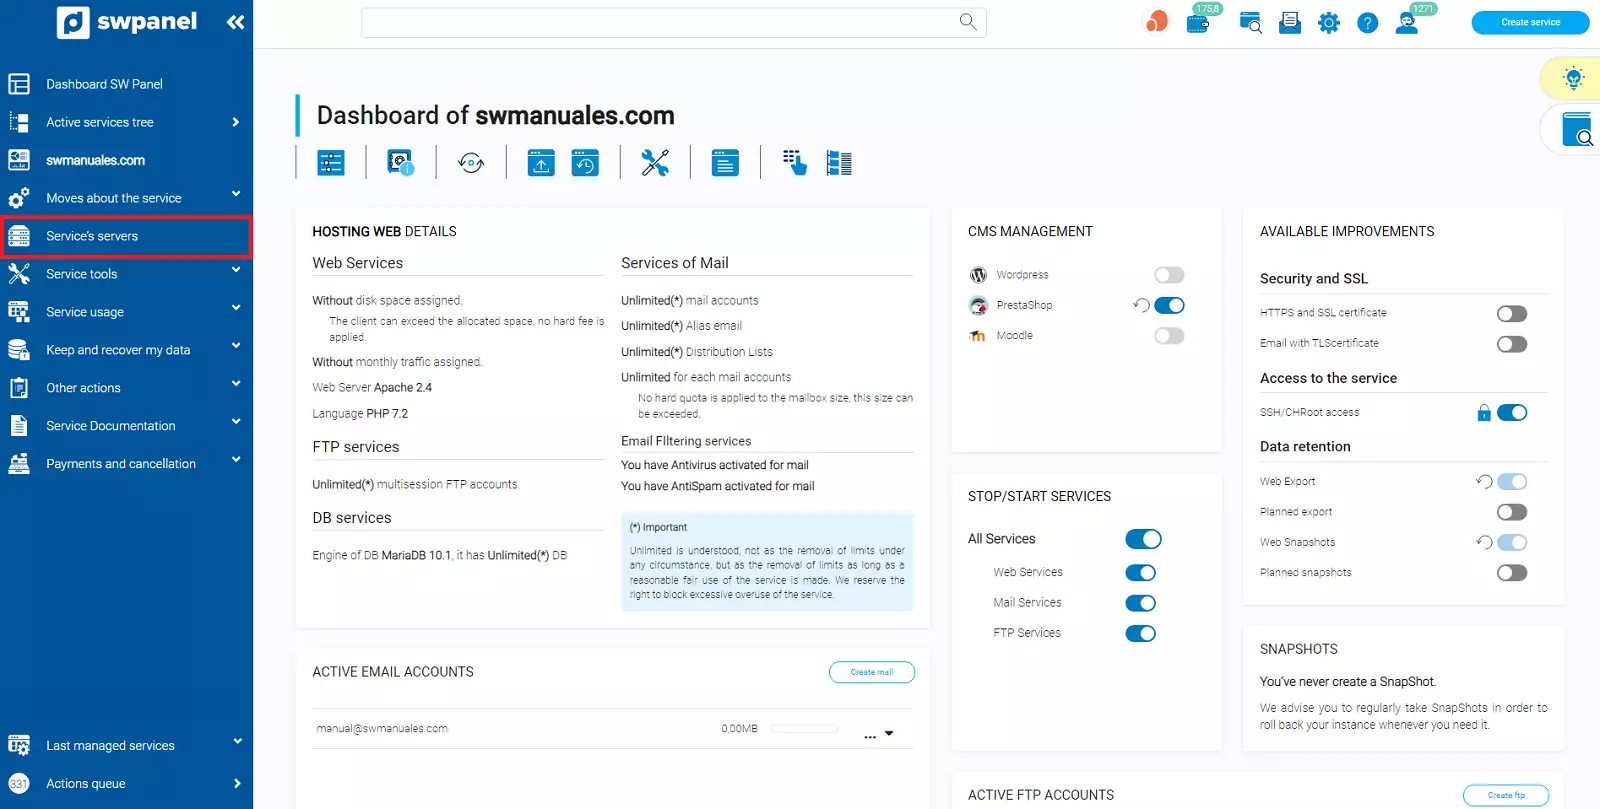
Once inside the hosting dashboard, click on the blue menu on the left under the option "Service Servers".
info_capture The screenshot is for reference only. It was taken from version 2025.02.0002 on 17/03/2025. It may differ from what the current version of SWPanel displays.
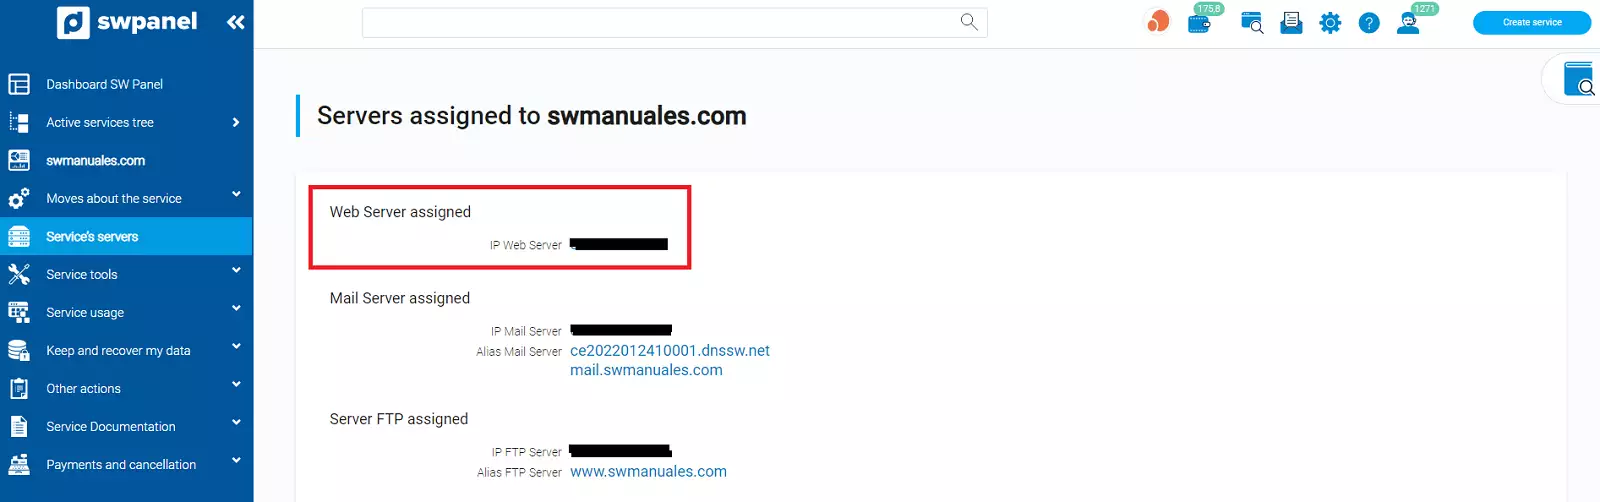
After clicking, all the servers used by our hosting service will appear. We are interested in the IP of the Assigned Web Server.
info_capture The screenshot is for reference only. It was taken from version 2025.02.0002 on 17/03/2025. It may differ from what the current version of SWPanel displays.
Gathering data - Port
The connection port for a hosting service within a cloud managed by SWPanel is 2200.
Gathering data - Method
We are attempting to connect to the remote console of our hosting service, which is hosted on our Cloud server. This connection is called Secure SHELL (SSH), so we will verify that the selected option is SSH.
Gathering data - User and Password
We will obtain the user and password for the connection by activating the SSH/CHRoot Access within the dashboard of our hosting service (under available upgrades).
info_capture The screenshot is for reference only. It was taken from version 2025.02.0002 on 17/03/2025. It may differ from what the current version of SWPanel displays.
If we don’t remember the password, we can click on the padlock in SSH/CHRoot Access, which will display the user and allow us to change the password (enter it and click "Yes, change").
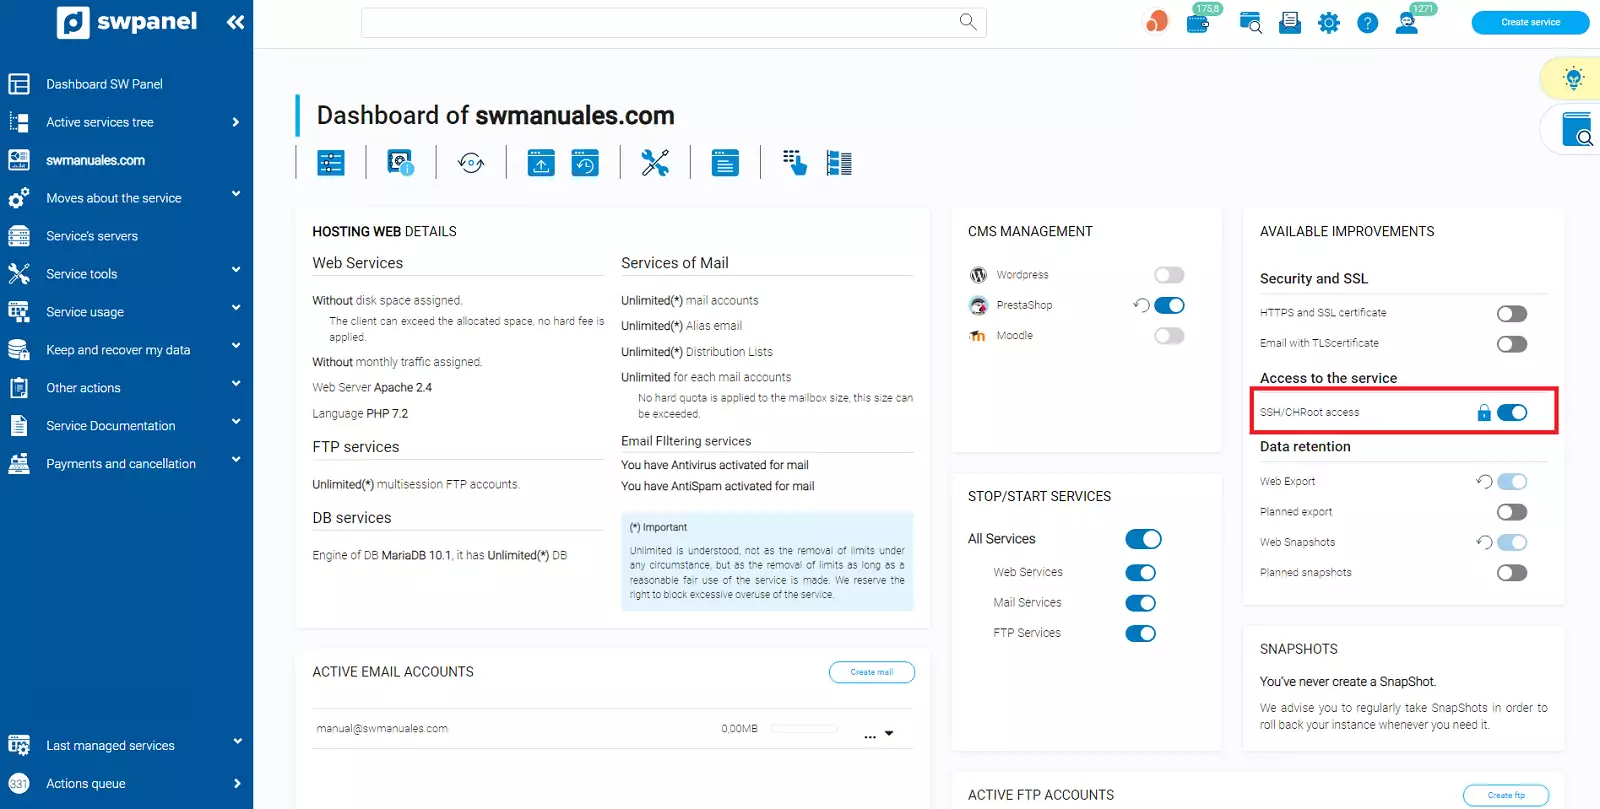
info_capture The screenshot is for reference only. It was taken from version 2025.02.0002 on 17/03/2025. It may differ from what the current version of SWPanel displays.
Connecting to our hosting service using PuTTY
To connect to our hosting service hosted within our cloud, we will use the PuTTY program.
Opening the PuTTY program
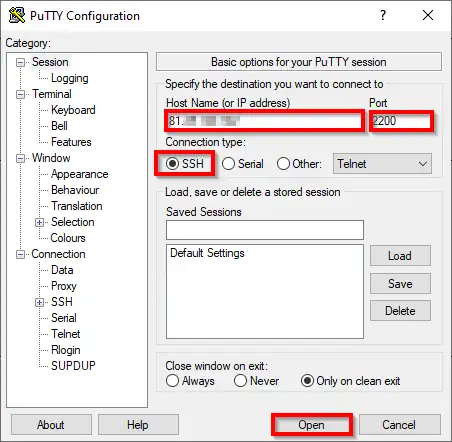
The first step is to open the PuTTY program. Locate its icon and double-click to launch it. If you don’t have a shortcut, search for it in the list of programs on your computer and click it. First, enter the IP, ensure the correct port (2200) is selected, verify the connection method (SSH), and finally click "Open".
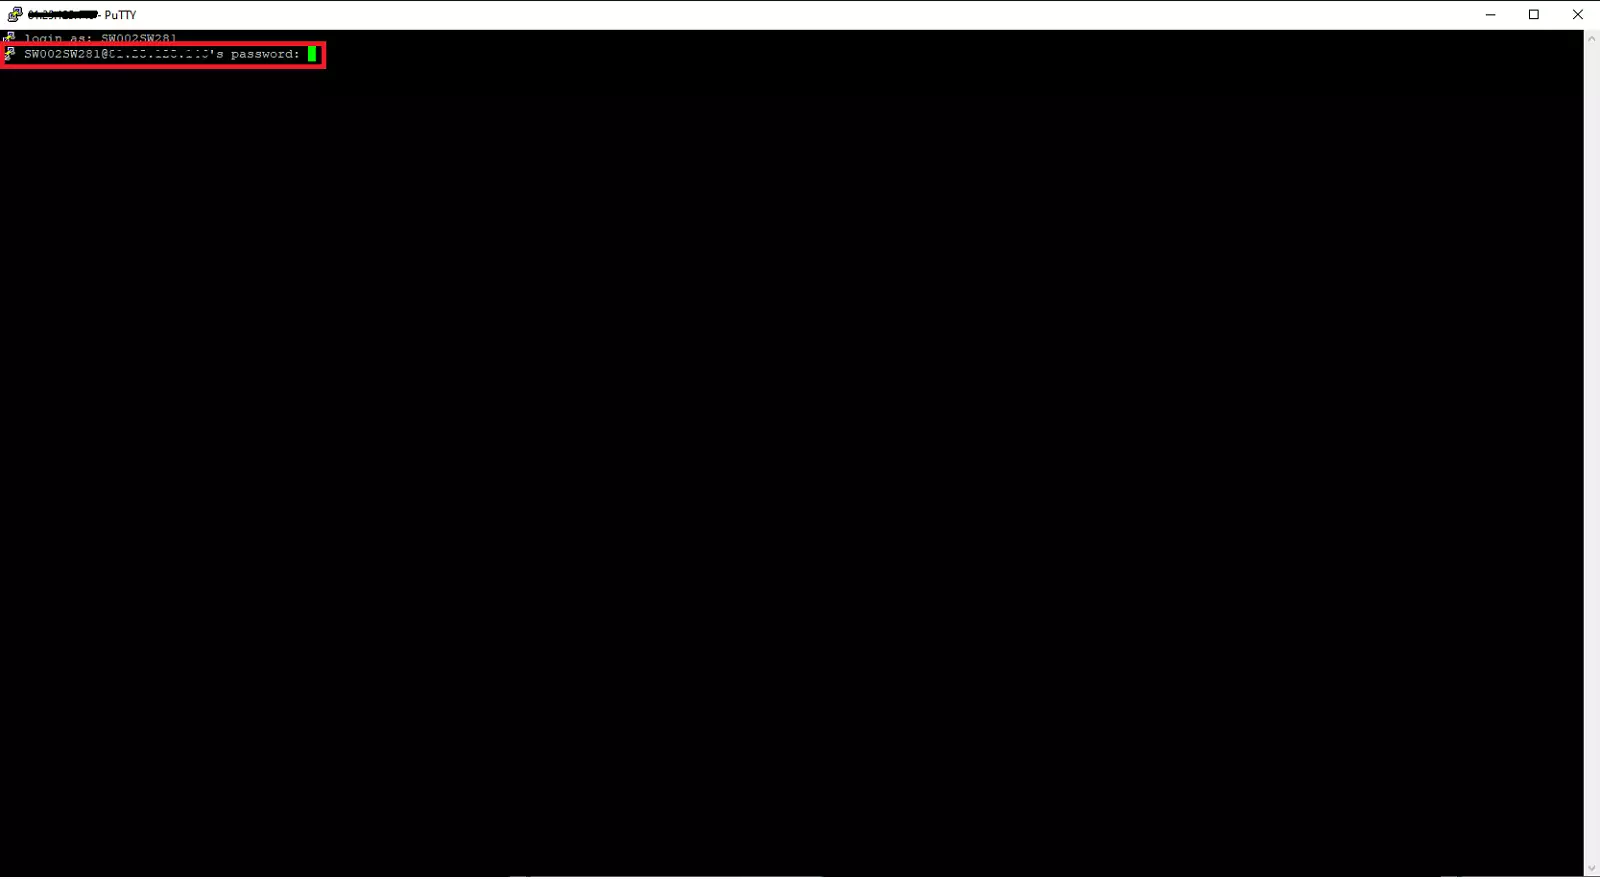
Connecting with PuTTY
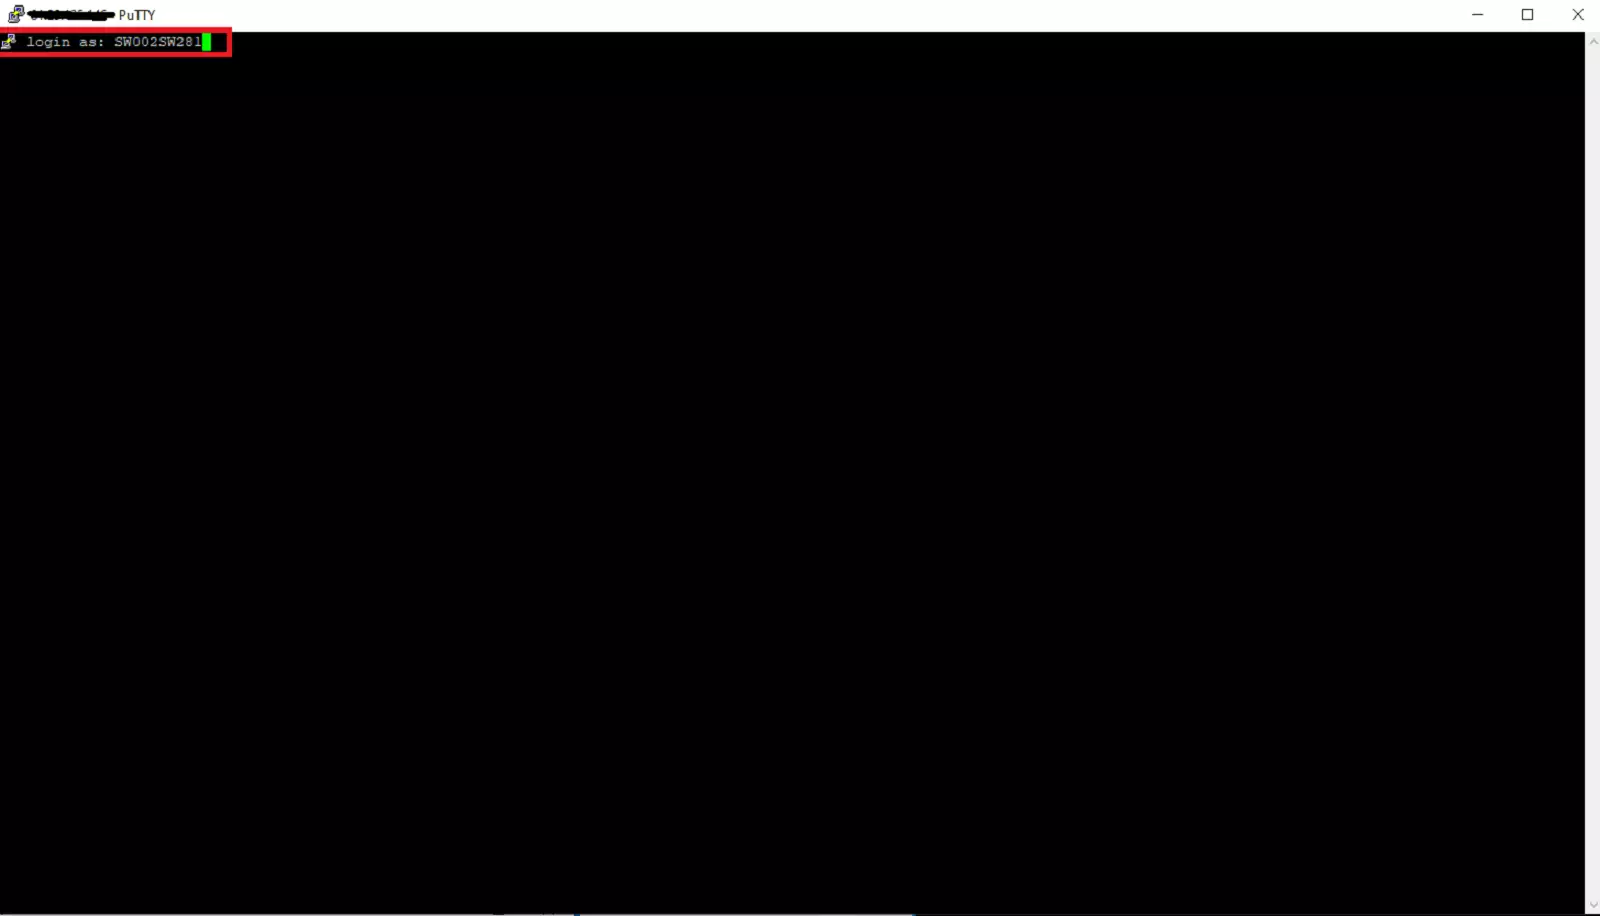
A pop-up window will appear asking which user we want to connect with; enter it and press "Enter".
Next, it will prompt for the password. Enter it (nothing will appear on the screen while typing for security reasons) and press "Enter".

And now we are connected to our hosting console.
⚠️To close the window and disconnect from the server, type the command "exit", and the program will terminate the connection and close automatically.⚠️
Done! We now know how to access our hosting service console using the PuTTY program.