How to manage the disk volumes of your Windows Server cloud server
All our Cloud servers with Windows operating system have a customized disk partitioning structure so that, once you have created your Cloud Windows server, you can easily decide whether you want your O.S. to have a single disk volume C:/ or you also want to have a second disk volume E:/
Below, we explain, for each version of Windows OS available for your Cloud, the two methods for your server to have a single C:/ disk volume or two C:/ + E:/ disk volumes
Windows Server 2012 R2 Std 64
The original 80GB disk structure of your Cloud server with Windows Server 2012 is as follows:

A) Server with a single disk volume C:/
-
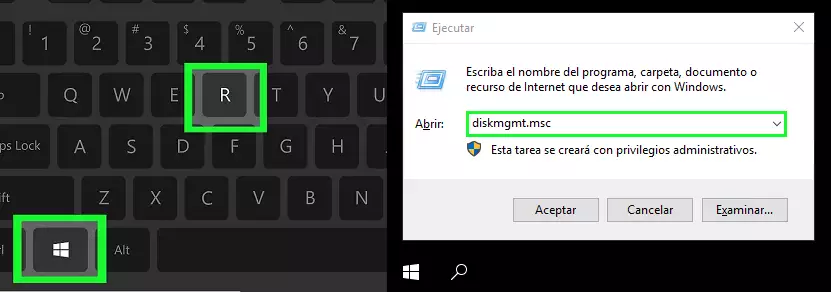
Press the "Windows + R" keys to open Run, type diskmgmt.msc and press the "Enter" key.
-
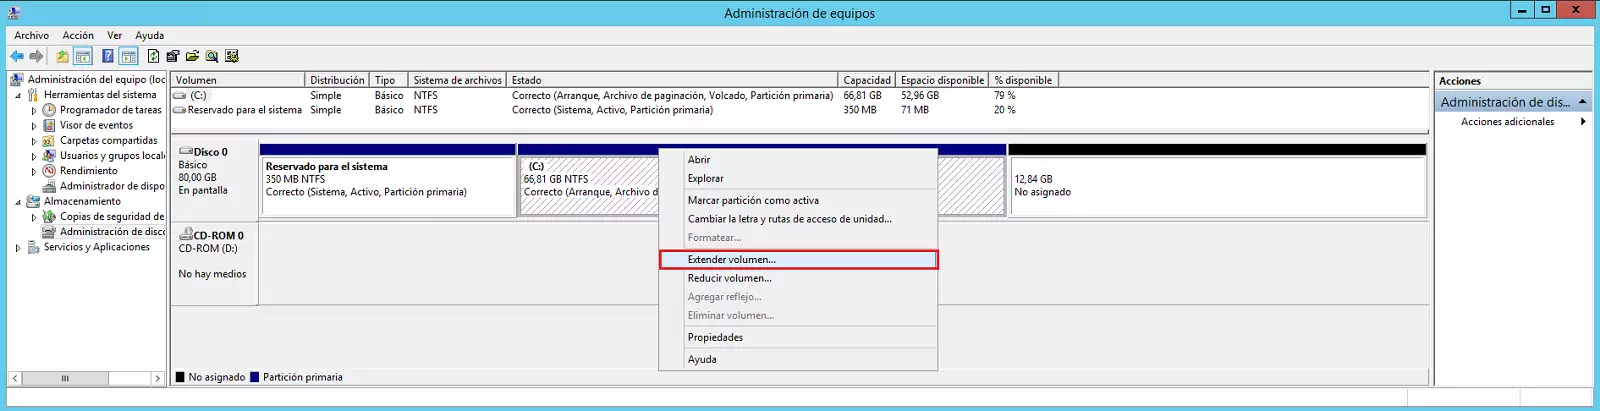
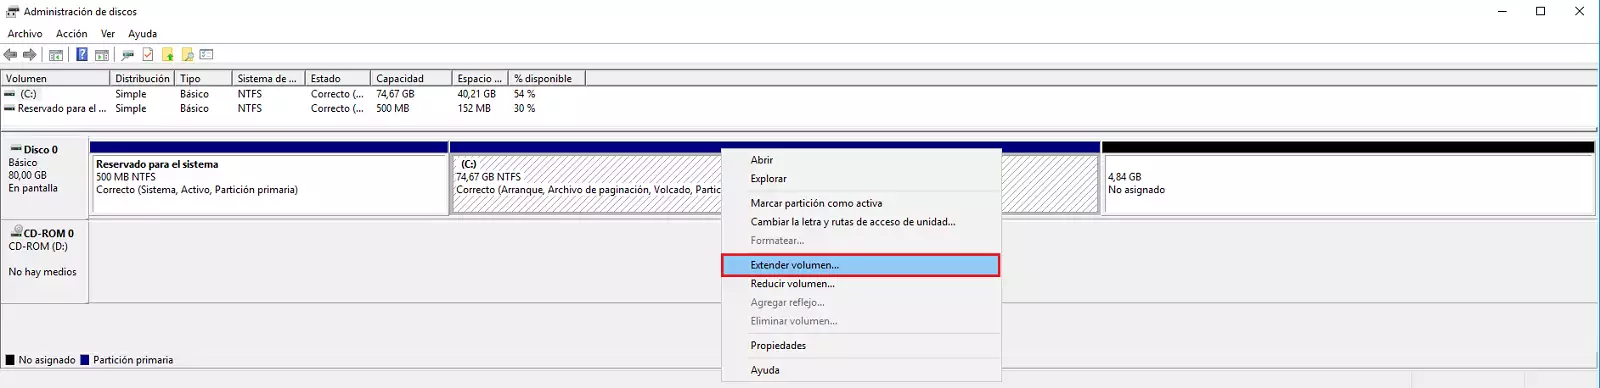
Once the Windows Disk Manager is open, place the mouse over the C: drive, right click on the drive and in the menu click on the option "Spread Volume..."
-
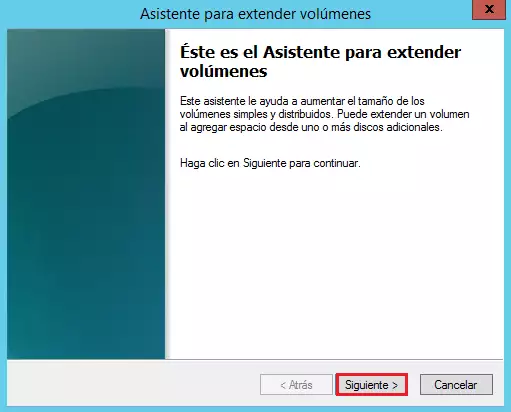
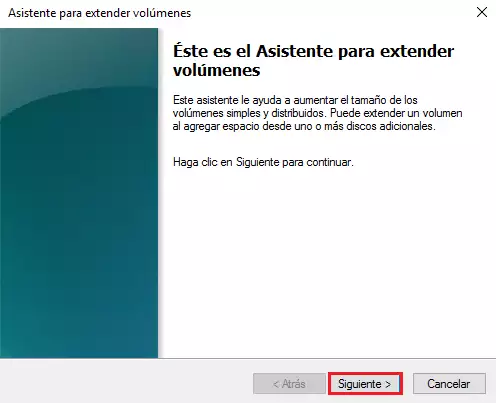
In the wizard for extending volumes click on the "Next >" button
-
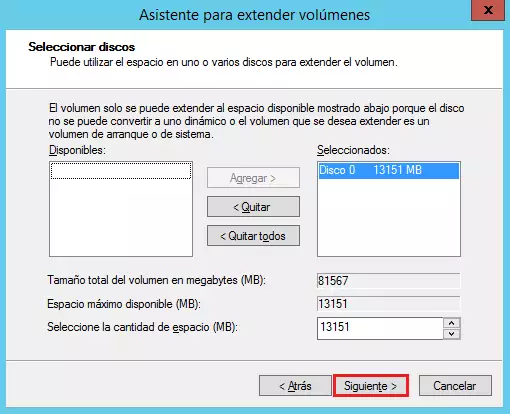
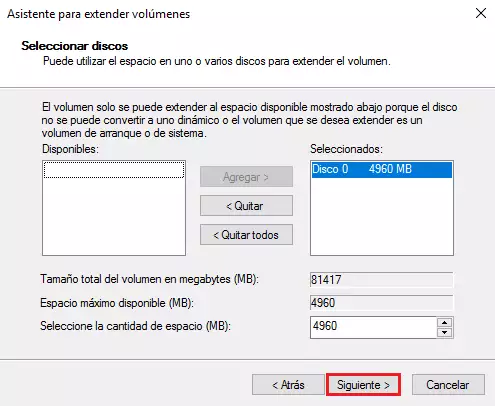
In the "Select disks" window click on the "Next >" button.
-
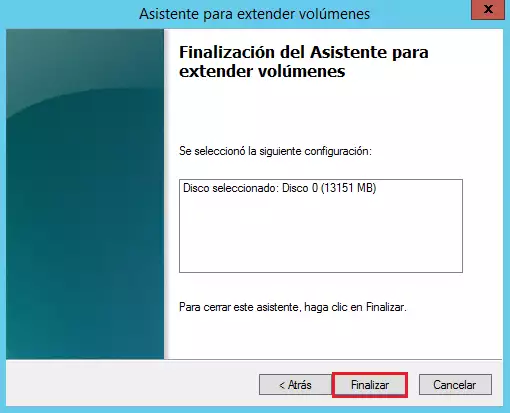
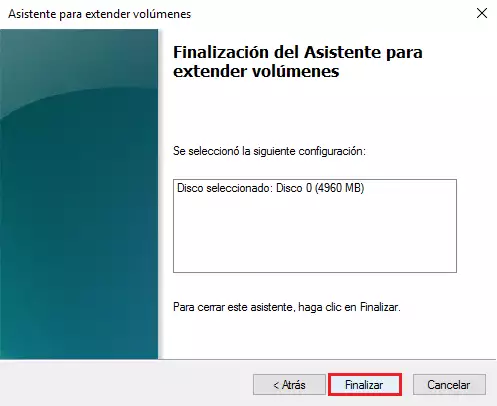
In the next window click on the "Finish >" button.
-
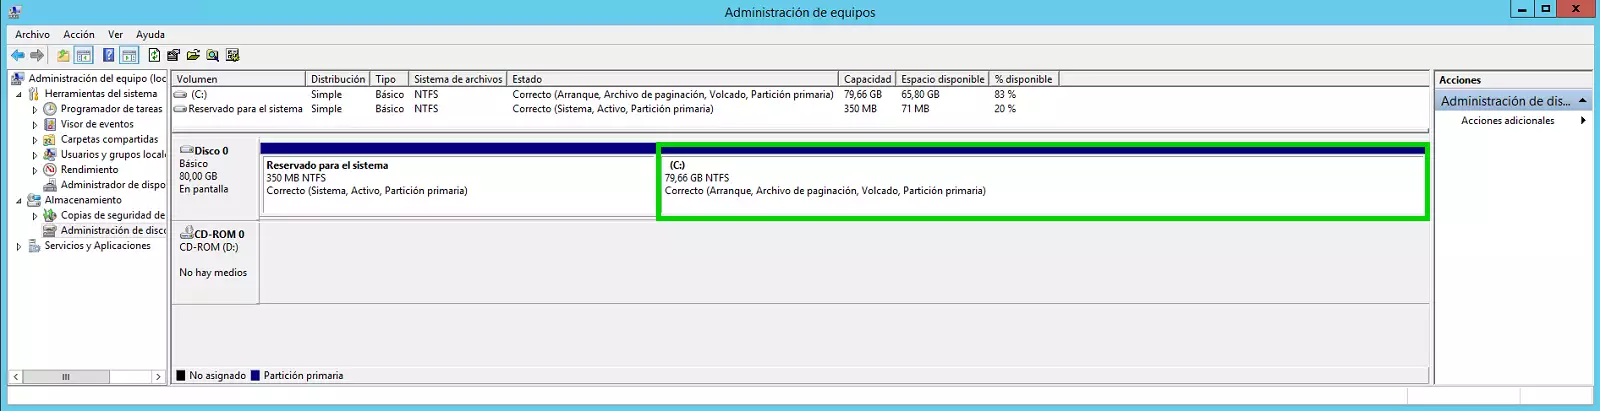
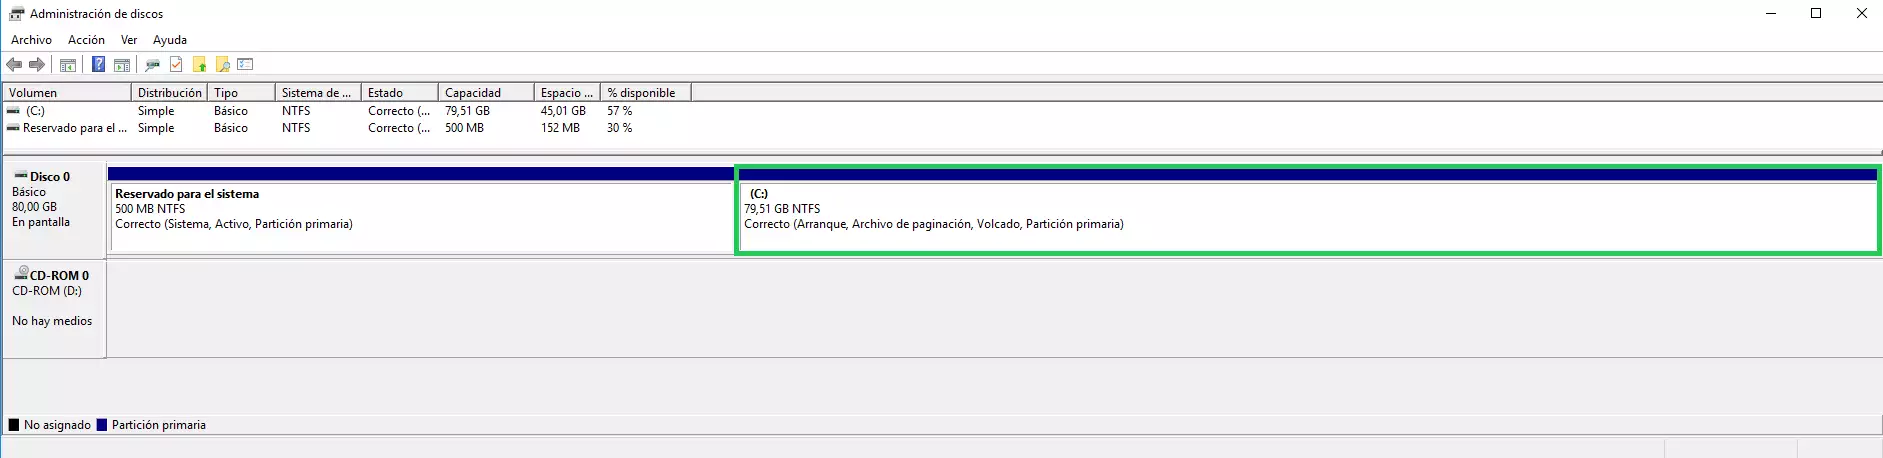
Then you can see how the disk volume C:/ has been extended and occupies all the available disk space of your Cloud server.
B) Server with one disk volume C:/ and a second disk volume E:/
-
Press the "Windows + R" keys to open Run, type diskmgmt.msc and press the "Enter" key.

-
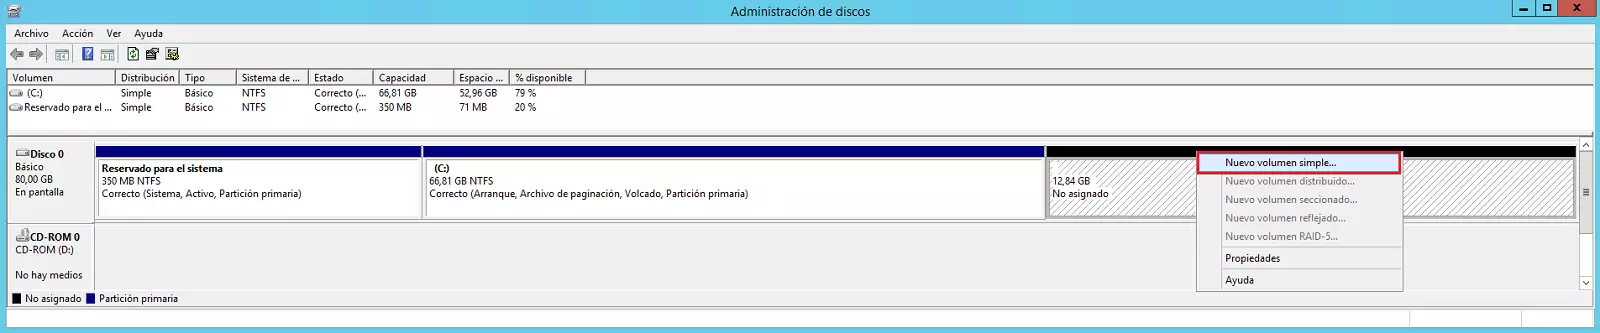
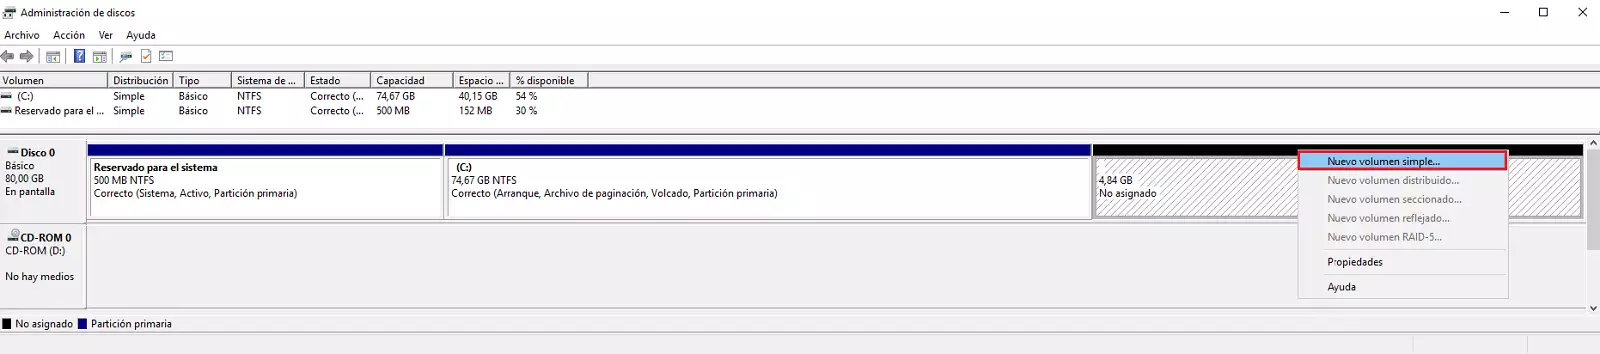
Once the Windows Disk Manager is open, place the mouse over the unallocated disk space, right click on it and in the menu click on the "New Simple Volume..." option
-
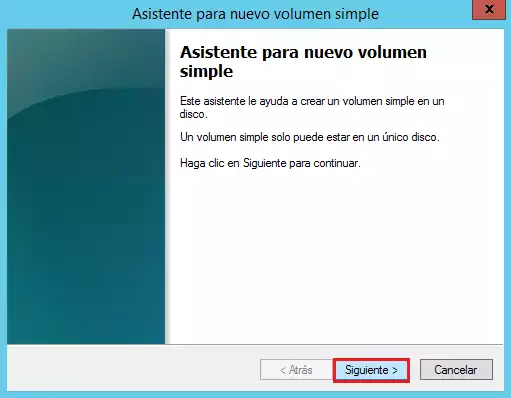
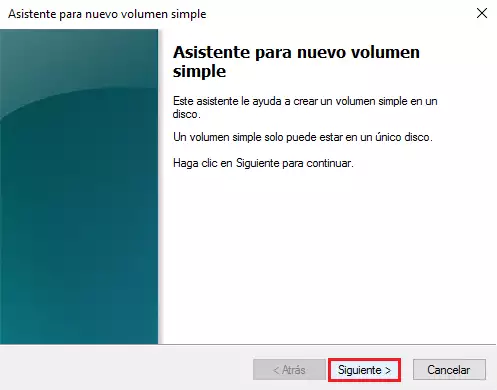
In the new simple volume wizard click on the "Next >" button
-
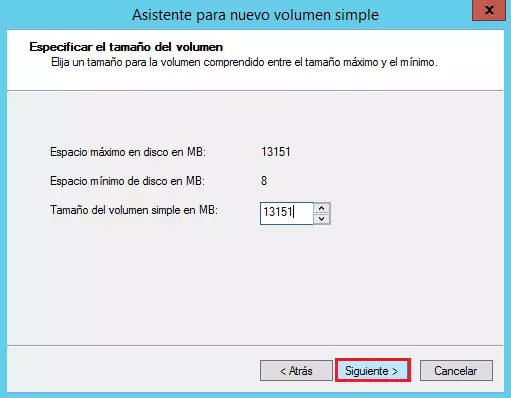
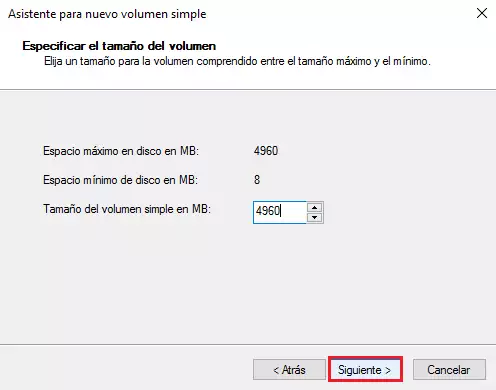
In the "Specify volume size" window click on the "Next >" button.
-
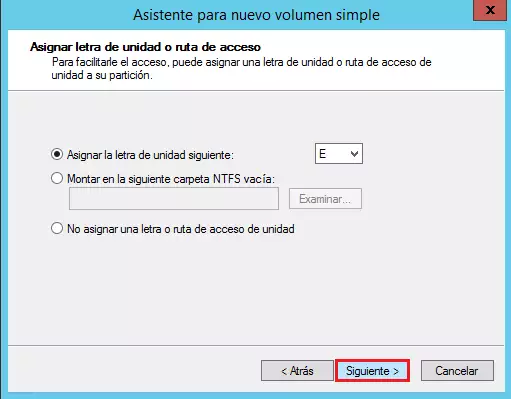
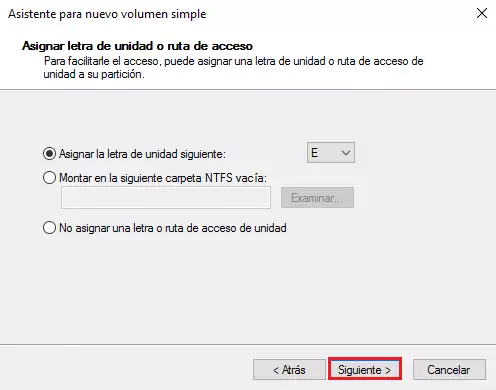
In the window for "Assign drive letter..." click on the "Next >" button.
-
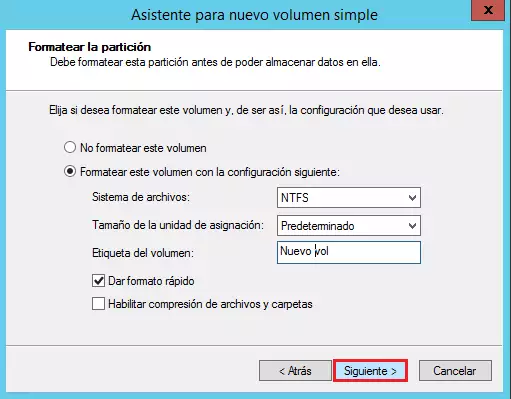
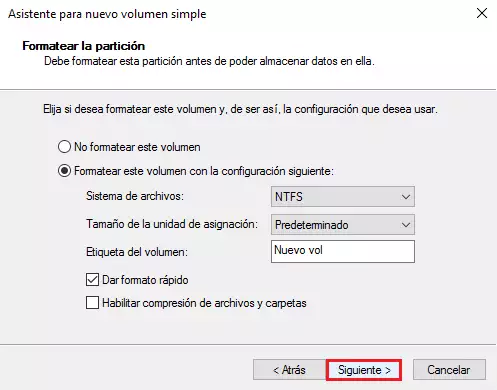
In the window for "Format partition" click on the "Next >" button.
-
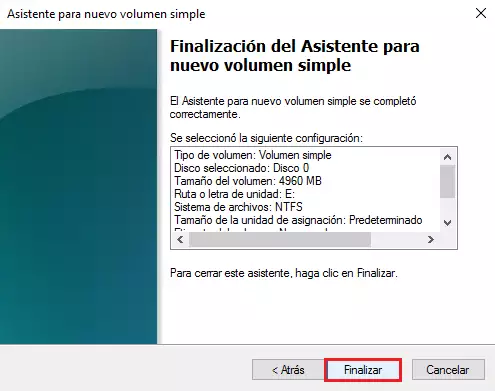
Then accept the changes for the creation of the new volume by clicking on the "Finish " button
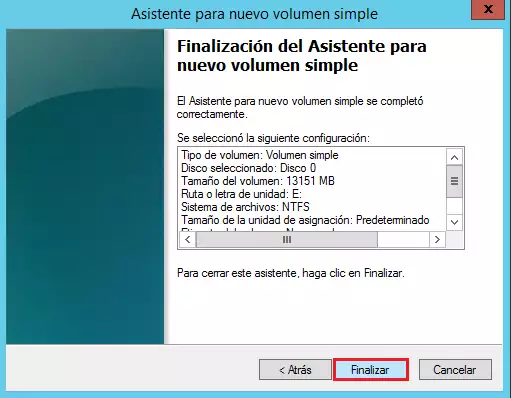
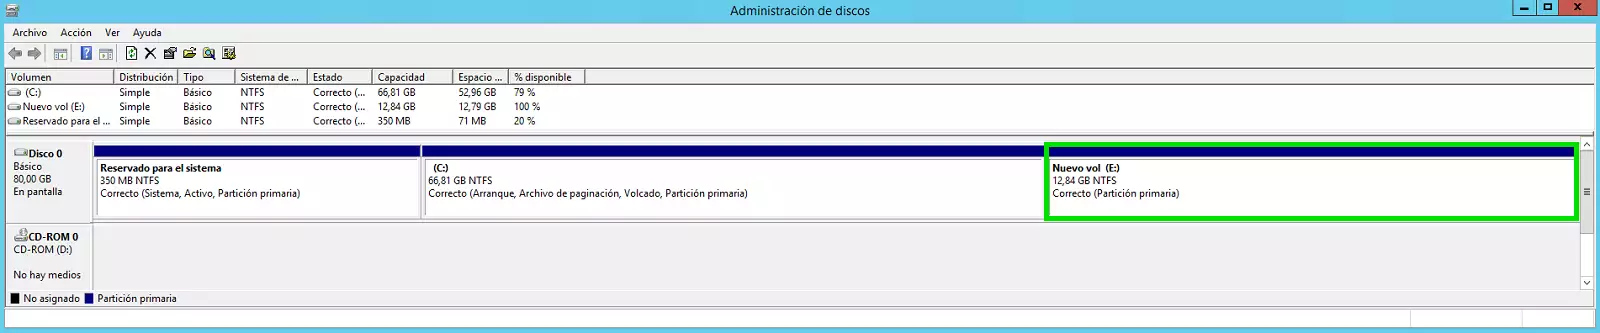
-
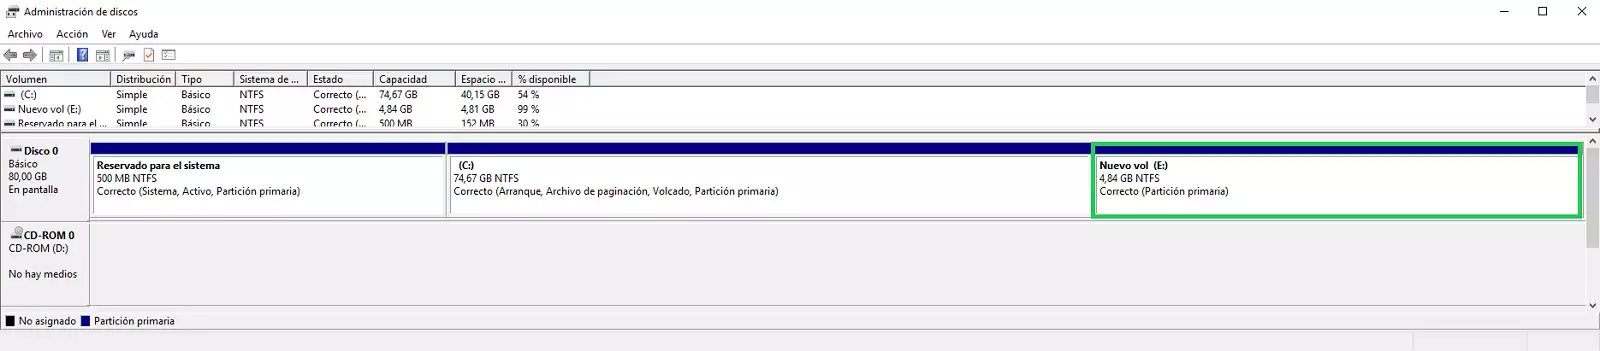
You will then be able to see how an E:/ disk volume has been created and occupies all the available disk space of your Cloud server.
Windows 2016/2019 Standard 64
The original 80GB disk structure of your Cloud server with Windows Server 2016/2019 is as follows:

A) Server with single disk volume C:/
-
Press the "Windows + R" keys to open Run, type diskmgmt.msc and press the "Enter" key.
-
Once the Windows Disk Manager is open, place the mouse over the C: drive, right click on the drive and in the menu click on the option "Spread Volume..."
-
In the wizard for extending volumes click on the "Next >" button
-
In the "Select disks" window click on the "Next >" button.
-
In the next window click on the "Finish >" button.
-
Then you can see how the disk volume C:/ has been extended and occupies all the available disk space of your Cloud server.
B) Server with one disk volume C:/ and a second disk volume E:/.
-
Press the "Windows + R" keys to open Run, type diskmgmt.msc and press the "Enter" key.

-
Once the Windows Disk Manager is open, place the mouse over the unallocated disk space, right click on it and in the menu click on the "New Simple Volume..." option
-
In the new simple volume wizard click on the "Next >" button
-
In the "Specify volume size" window click on the "Next >" button.
-
In the window for "Assign drive letter..." click on the "Next >" button.
-
In the window for "Format partition" click on the "Next >" button.
-
Then accept the changes for the creation of the new volume by clicking on the "Finish " button
-
You will then be able to see how an E:/ disk volume has been created and occupies all the available disk space of your Cloud server.